
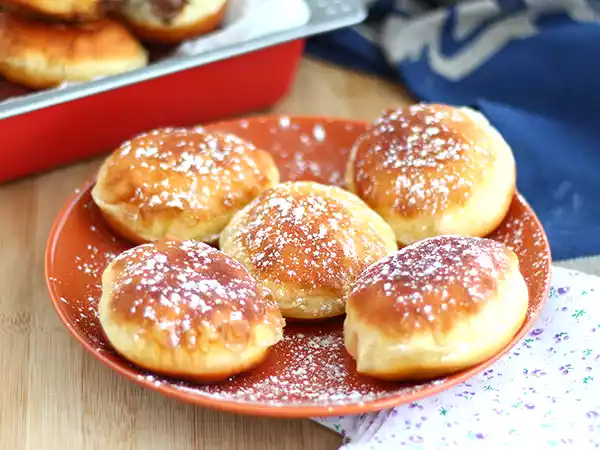
Indulge in Homemade Chocolate-Filled Doughnuts: A Step-by-Step Guide
There’s a special kind of joy that comes with biting into a perfectly soft doughnut, especially when it’s generously filled with a rich, decadent chocolate spread. The aroma of freshly fried dough, coupled with the promise of melted chocolate within, is an irresistible combination. Now, imagine recreating this delightful experience in your own kitchen. This guide will walk you through the process of crafting these extra indulgent doughnuts from scratch, ensuring a truly rewarding baking adventure. We’ve meticulously detailed each step, complemented by illustrative photographs and a video recipe to help you master the techniques for achieving doughnut perfection.

Essential Ingredients for Your Doughnut Masterpiece
To achieve that signature soft texture and delightful flavour, gather the following ingredients:
- Flour: 2.75 cups
- Dried Baker’s Yeast: 2 teaspoons (or 10 grams of fresh yeast)
- Eggs: 2 large
- Milk: 1/4 cup
- Water: 1/4 cup
- Salt: 2 teaspoons
- Sugar: 1/4 cup
- Softened Butter: 1 ounce
- Oil for Frying: Sufficient quantity for deep frying
- Chocolate Spread: 7 ounces, for filling
Essential Equipment for Doughnut Creation
A few key tools will make the process smoother:
- Stand Mixer: Highly recommended for achieving the perfect dough consistency.
- Frying Pan: A deep pan suitable for frying.
The Art of Doughnut Preparation: A Detailed Walkthrough
Follow these steps meticulously to create your delectable homemade doughnuts:
Step 1: Activating the Yeast

Begin by gently warming your milk. In a small bowl, combine the warm milk with the dried baker’s yeast. Let this mixture sit for about 5-10 minutes, or until it becomes frothy. This indicates that the yeast is active and ready to work its magic. If using fresh yeast, simply crumble it directly into the warm milk.
Step 2: Building the Dough Base

In the bowl of your stand mixer, add the flour, sugar, and salt. Create a well in the centre of the dry ingredients. Pour the activated yeast and milk mixture into the well, followed by the water and the two eggs.
Step 3: Initial Mixing

Using the dough hook attachment on your stand mixer, begin mixing the ingredients on a low speed. Continue mixing until a cohesive dough starts to form. Scrape down the sides of the bowl as needed to ensure all ingredients are incorporated.
Step 4: Incorporating Butter and Developing Gluten

Once the dough has come together, gradually add the softened butter, a little at a time, while the mixer is still running. Continue to mix on a medium speed. You’ll know the dough is ready when it becomes smooth, elastic, and starts to pull away cleanly from the sides of the mixing bowl. This process develops the gluten, crucial for a light and airy texture. Once the dough has reached this stage, cover the bowl and let it rise at room temperature for approximately 30 minutes.
Step 5: The First Degassing and Chill

After the initial rise, gently punch down the dough to release the trapped air. This process is known as “degassing.” Transfer the dough to a lightly floured surface and then place it in a lightly oiled bowl. Cover the bowl and refrigerate for 1 hour. This chilling period helps to firm up the dough, making it easier to handle and shape.
Step 6: Shaping and Second Rise

Remove the dough from the refrigerator and degas it once more by gently pressing out the air. On a lightly floured surface, roll out the dough to a thickness of about 1 cm. It’s important that the dough remains flexible, so avoid applying excessive pressure. Using a cookie cutter with a diameter of approximately 7 cm, cut out your doughnut shapes. Carefully place these cut-out doughnuts onto a baking tray lined with parchment paper. Cover the tray loosely and allow the doughnuts to rise again at room temperature for about 1 hour, or until they appear visibly puffed up.
Step 7: The Frying Process – Golden Perfection

Heat a generous amount of oil in your frying pan over medium heat. The oil should be hot but not smoking. Carefully slide a few doughnuts into the hot oil, being careful not to overcrowd the pan. Fry them for approximately 4 minutes on each side, ensuring they cook evenly and develop a beautiful golden-brown colour.
Step 8: Flipping for Even Cooking

Once the first side of the doughnuts has reached a lovely golden hue, carefully flip them over using a slotted spoon or tongs. Continue to fry the other side for another 4 minutes, or until it also achieves the same golden-brown perfection.
Step 9: The Delicious Filling

Once the doughnuts have cooled slightly (they should still be warm for easier filling), it’s time for the best part! Using the tip of a sharp knife, carefully make a small incision on the side or bottom of each doughnut. This creates a pocket for the filling. Fill a piping bag or a syringe with your chocolate spread. Insert the nozzle into the incision and gently squeeze, filling the doughnut with the luscious chocolate.
Step 10: Ready to Enjoy!

And there you have it – your homemade, chocolate-filled doughnuts are ready to be devoured! The combination of the soft, airy dough and the rich, molten chocolate centre is a truly delightful treat.
You Might Also Enjoy These Doughnut Variations:
- Gogoshi – A Romanian Style Donut
- Cheat Version Donut
- Buffet-Style Chinese Donuts